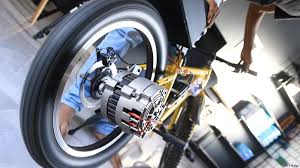
Diy Electric Bike, Are you looking for a sustainable and cost-effective mode of transportation? Building a DIY electric bike (e-bike) might be the perfect project for you! Not only can you customize your ride to fit your style, but you’ll also gain a deeper understanding of how e-bikes work. In this guide, we’ll walk you through the essential steps and components needed to create your own electric bike.
Why Build a DIY Electric Bike?
- Cost-Effective: Purchasing a pre-built e-bike can be expensive. By building your own, you can save money while getting a customized experience.
- Customization: You can choose the frame, battery, motor, and other components that best fit your needs.
- Learning Experience: Building your own e-bike allows you to learn about electric bike technology, improving your skills for future projects.
Tools and Materials You’ll Need
Before you start, gather the necessary tools and materials:
- Tools:
- Basic hand tools (wrenches, screwdrivers, pliers)
- Wire cutters and strippers
- A multimeter for testing electrical connections
- Drill (if modifications to the frame are needed)
- Materials:
- A bicycle frame (mountain bike or hybrid recommended)
- Electric bike conversion kit (includes motor, battery, controller, and other components)
- Additional accessories (lights, fenders, racks)
Step-by-Step Guide
Step 1: Choose Your Bicycle Frame
Start with a sturdy bicycle frame that suits your riding style. Mountain bikes and hybrids work well because they can support the added weight of the electric components. Ensure the frame is in good condition and can accommodate the size of the motor and battery you plan to use.
Step 2: Select an Electric Bike Conversion Kit
Research various electric bike conversion kits available online or at local bike shops. Look for kits that include:
- Motor: Typically located in the hub of the front or rear wheel, or mounted to the bike frame. Choose between a hub motor or a mid-drive motor based on your preferences.
- Battery: Look for lithium-ion batteries that provide a good balance between weight and capacity. The battery’s voltage and amp-hour rating will determine your bike’s speed and range.
- Controller: This component regulates the power from the battery to the motor and often includes features like a display panel.
Step 3: Install the Motor
Follow the instructions provided with your conversion kit to install the motor. For a hub motor, remove the existing wheel and replace it with the motorized wheel. For a mid-drive motor, you may need to remove the bike’s crankset and install the motor according to the manufacturer’s instructions.
Step 4: Mount the Battery
Determine a suitable location for the battery, which is typically mounted on the frame or rear rack. Ensure it is securely fastened and easily accessible for charging. Connect the battery to the motor and controller as per the instructions.
Step 5: Connect the Controller and Wiring
Carefully connect the controller to the motor and battery, following the wiring diagram provided with your kit. Use a multimeter to ensure connections are secure and functioning properly.
Step 6: Test Your Electric Bike
Before taking your DIY electric bike out for a ride, test all components to ensure they are functioning correctly. Check the brakes, lights, and any other electrical components. Once you’re confident everything is in order, take your bike for a short test ride to make sure it performs well.
Safety Tips
- Always wear a helmet while riding your e-bike.
- Follow local laws and regulations regarding e-bike usage, including speed limits and where e-bikes are allowed.
- Regularly inspect your bike for any loose connections or wear and tear.
Conclusion
Building a DIY electric bike can be a rewarding experience that provides both a practical mode of transportation and an enjoyable hobby. With the right tools, materials, and guidance, you can create a customized e-bike that suits your lifestyle. So gather your supplies, get creative, and start your journey towards sustainable commuting with your very own electric bike!
You Might Also Like These:

